
Key Takeaways
A successful repot usually depends more on timing, drainage, and gentle handling than on buying an elaborate collection of supplies.
- Check for crowded roots and tired potting mix before repotting.
- Choose a pot only slightly larger than the current root ball.
- Use a free-draining mix suited to the plant.
- Handle roots carefully and keep the plant at its original depth.
- Give the plant steady, gentle care while it settles.
Understand when a plant needs repotting
Repotting is useful when a houseplant has outgrown its container or the potting mix no longer supports healthy growth. It is not a task we need to perform on a fixed schedule for every plant. This repotting guide beginners can trust starts with observation, because the plant usually gives us clues before it needs a larger home.
Signs of a root-bound plant
A root-bound plant has roots packed tightly around the outside of its root ball, leaving little loose mix for water and air. Roots may appear through drainage holes, circle the surface of the mix, or lift the plant slightly from its pot. We may also notice that water runs straight through, the plant dries unusually quickly, or the container has become unstable under top-heavy growth.
The clearest check is to slide the plant gently from its container and inspect the root ball. A dense network of circling roots suggests that the plant would benefit from fresh mix and a little more room, although not necessarily from a dramatically larger pot.
How soil condition affects repotting decisions
Potting mix can settle, break down, or become difficult to wet evenly over time. If it stays soggy for too long, smells unpleasant, or has hardened into a dense mass, refreshing it may help even when the roots have not filled the container. A crust of mineral deposits on the surface or around the rim is another reason to inspect the mix rather than simply adding more water.
We should distinguish tired mix from a watering problem. A plant may wilt because it is too dry, too wet, or sitting in poor light, so repotting alone will not correct every issue. Once we understand the condition of the roots and mix together, the decision becomes much less guesswork.
Choosing the right season
For many indoor plants, the start of active growth in spring is a comfortable time to repot. Warmer conditions and stronger light can help a plant recover and begin producing new roots. Indoor temperatures and light vary, though, so we should consider the plant’s actual growing conditions rather than relying on the calendar alone.
We can repot outside the usual season when there is an urgent problem, such as severely compacted mix, damaged drainage, or evidence of serious root trouble. Otherwise, waiting for a period of active growth usually makes the adjustment easier.
When repotting may do more harm than good
A plant that is already struggling may not need the additional disturbance of a full repot. Recent moves, sudden changes in temperature, pests, poor light, and inconsistent watering can all cause symptoms that resemble a root problem. If the roots are healthy and the mix drains reasonably well, stabilising the plant first may be the kinder choice.
We should also avoid repotting a plant simply because its container looks small. Some plants grow well when their roots are fairly snug. If the plant is stable, growing normally, and the mix remains workable, we can monitor it rather than intervening immediately.
Choose the right pot and potting mix
The new container and its mix affect how much moisture remains around the roots. A good choice gives the plant enough room to continue growing without leaving a large volume of wet soil around a small root ball. We should also think about weight, airflow, drainage, and where the pot will sit in the apartment.
Selecting the correct pot size
Choose a container only modestly wider than the existing root ball, generally allowing a little room around the sides for fresh mix. A very large pot can hold moisture for too long, while a pot that is barely larger may leave no useful space for new roots. The final choice should also keep the plant upright and balanced.
Before buying a new container, we can use the current one as a guide and consider the plant’s growth rate. These practical checks help us avoid choosing by appearance alone:
- Compare the new pot with the root ball, not just the height of the plant.
- Allow room for fresh mix without burying the stem or crown.
- Check that the container will remain stable once the plant is watered.
- Leave enough space at the rim for watering without overflow.
After the list, we should still test the plant’s height in the empty pot. A small adjustment to the amount of mix underneath can prevent the plant from sitting too deeply or too high.
Comparing plastic, ceramic, and terracotta pots
Plastic pots are light, flexible, and often retain moisture for longer. Glazed ceramic pots can be attractive and stable, but their weight makes large plants harder to move. Terracotta is porous and can allow the mix to dry more quickly, which may suit some plants but require closer attention to watering.
No material is automatically best. We should match the pot to the plant’s moisture needs, the light and temperature of the room, and how often we can realistically check it. A nursery pot placed inside a decorative cover can also make future inspection and repotting simpler, provided excess water is emptied from the cover.
Matching potting mix to plant type
Indoor plants generally need a mix that holds some moisture while still allowing air to reach the roots. Plants that prefer drier conditions usually need a faster-draining blend, whereas moisture-loving plants may tolerate a mix that retains a little more water. The label can guide us, but the plant’s leaves, roots, and watering response remain useful evidence.
We should avoid treating one mix as suitable for every plant. A coarse, airy texture can be helpful for plants prone to staying wet, while a finer mix may be appropriate where the root ball dries too quickly. Whatever we choose, the mix should be clean, fresh, and free from garden soil.
Understanding drainage holes and saucers
A drainage hole gives excess water a way out of the root zone. Without one, water can collect at the bottom of the container even when the surface appears dry, making the roots more vulnerable to stress. A saucer or tray protects furniture and floors, but it should not become a permanent reservoir.
After watering, we should allow the pot to drain fully and then empty any water gathered underneath. Placing a layer of stones inside a pot without a drainage hole does not create true drainage; it can simply move the saturated layer closer to the roots.
Prepare the plant and workspace
A calm setup makes repotting easier on both the plant and us. We should gather supplies first, inspect the root ball before making decisions, and choose a place where spilled mix will not become a larger problem. Taking a few minutes to prepare also reduces the temptation to rush when the plant is temporarily out of its pot.
Gathering essential tools and supplies
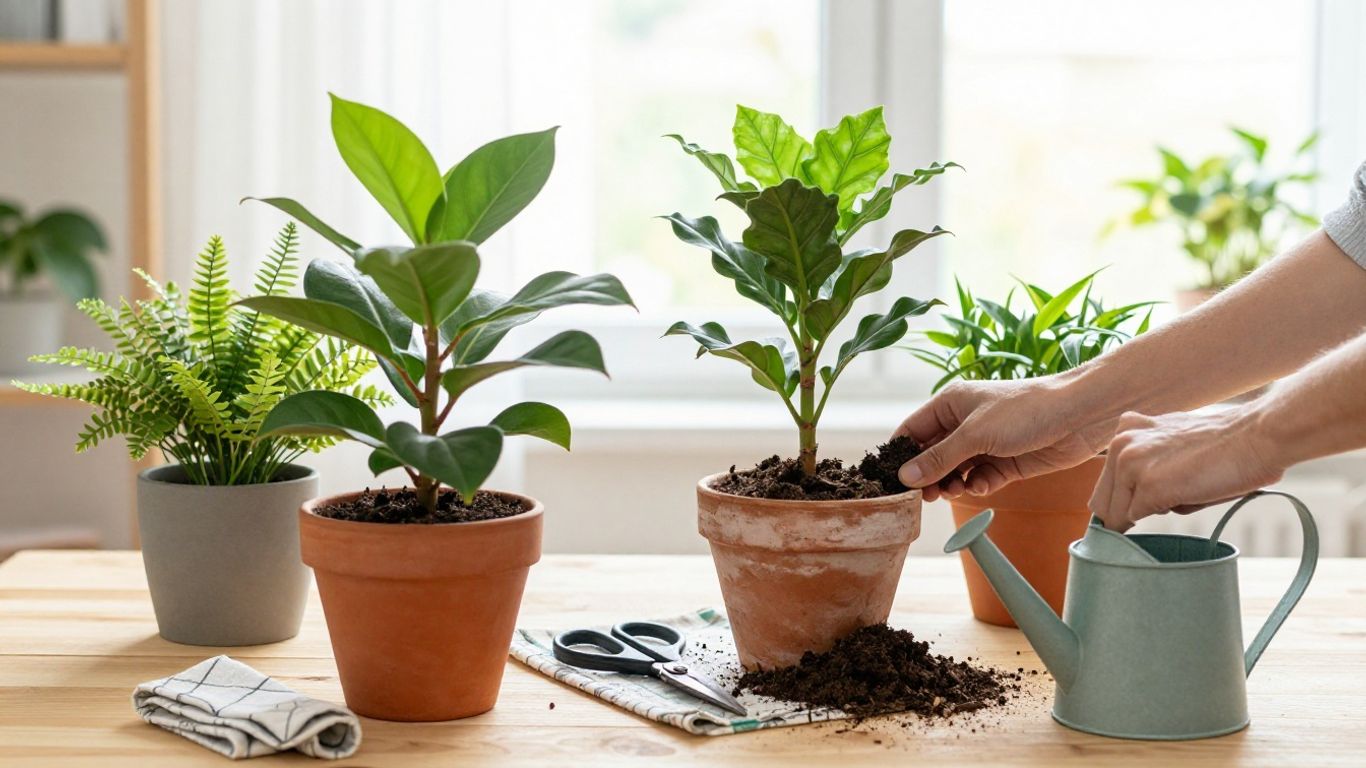
We usually need the new container, suitable potting mix, a small scoop, clean scissors or secateurs, and something to protect the work surface. A clean cloth, gloves, and a watering can are useful additions. If the plant is large, having another person nearby can make it safer to support the stems and root ball.
Tools should be clean before they touch the roots. We do not need specialised equipment for most houseplants, but we do need enough mix to fill around the root ball and a place to set the plant while we work.
Inspecting roots before repotting
Once the plant is out, examine the roots without pulling apart every strand. Healthy roots are usually firm, while roots that are soft, hollow, or badly discoloured may need to be removed. The overall shape also matters: roots tightly circling the outside suggest crowding, while a loose root ball may need only a refresh of the surrounding mix.
This inspection is our chance to change the plan. If the roots look healthy, we can keep disturbance to a minimum. If there is substantial damage, we should remove only what is clearly unhealthy and make sure the replacement pot and mix drain well.
Watering the plant before the process
Watering a day or so before repotting can leave the root ball cohesive without making it saturated. A completely dry root ball may crumble as we handle it, while a waterlogged one can be heavy and difficult to assess. The right timing depends on the plant and the existing mix, so we should aim for lightly moist rather than dripping wet.
We should not water automatically if the mix is already wet. Instead, we can let the plant drain and wait until the root ball is manageable. This small adjustment can reduce mess and make the roots easier to handle.
Protecting surfaces and reducing mess
A table covered with paper, an old towel, or a washable mat gives spilled mix somewhere to land. We can place the new pot, tools, and a small container for discarded roots within reach before starting. Keeping the work area organised matters because a fallen plant is much easier to damage when we are searching for supplies.
For larger plants, we should work close to the floor or use a stable surface that gives us room to turn the container. Once finished, we can fold the covering inward, wipe the leaves if needed, and return the plant only after the surrounding surface is dry.
Follow the repotting process step by step
The repot itself is a sequence of gentle adjustments rather than a forceful transplant. We want to preserve as much of the healthy root ball as possible while replacing compacted mix and giving the roots room to extend. Working slowly also helps us notice the correct depth before the container is full.
Removing the plant from its current pot
Support the plant near the base while tipping or tilting the container, rather than pulling on the leaves or stems. A flexible nursery pot can be squeezed lightly around the sides; a rigid pot may need gentle tapping or a slow turn. If the plant resists, pause and loosen the edge of the root ball instead of increasing the force.
Once the plant comes free, set it on the protected surface and keep the root ball supported. We can remove loose pieces of old mix, but there is no need to strip every particle from healthy roots.
Loosening and trimming crowded roots
Use our fingers to loosen only the outermost crowded roots, particularly where they form tight circles. This encourages roots to move into the new mix without creating unnecessary damage. We can trim roots that are clearly dead, mushy, or broken with clean scissors, leaving firm healthy roots in place.
A light touch is usually enough. Cutting a large amount of healthy root material can make recovery harder, so we should not reshape the root ball simply to make it look tidy.
Positioning the plant at the correct depth
Add a little mix to the bottom of the new pot, then place the plant in the centre and check its height. The top of the root ball should sit near the level it occupied before, with the stem or crown above the mix rather than buried. We can rotate the plant until its best side faces the room before filling around it.
This is the moment to make corrections, because adjusting the height becomes awkward once the pot is full. A plant set too deeply may stay wet around its base, while one set too high may leave roots exposed.
Filling the pot without compacting the soil
Add mix around the root ball in small amounts, gently tapping the container to settle it into gaps. We can press lightly with our fingers, but the aim is an even, airy fill rather than a hard-packed mass. Leave a little room below the rim so watering does not wash mix over the sides.
Check that the plant remains upright as we work. The finished surface should support the root ball without burying the stem, and the container should feel stable before we move it to its usual position.
Care for a plant after repotting
The first days after repotting are a settling period. Even a careful process disturbs some roots, so the plant may pause or look less vigorous while it adjusts. We can help most by keeping conditions steady instead of changing several things at once.
Watering immediately after repotting
If the new mix is dry and the plant is suited to being watered after repotting, water slowly until some moisture reaches the drainage hole. This settles the mix around the roots and reveals whether water can move through the container. Let the pot drain fully before placing it on a saucer or inside a cover pot.
We should not continue watering simply because the plant has been moved. Check the mix and the plant’s normal needs first, then allow the surface and root zone to dry to the extent appropriate for that species.
Managing light, temperature, and humidity
Place the plant in bright, indirect light unless its usual care calls for something different. Avoid sudden exposure to harsh direct sun, cold draughts, heaters, or air-conditioning immediately after the move. Stable room conditions give disturbed roots time to resume their work.
We can keep the plant near its usual position if that spot is suitable, making only small changes when necessary. Extra humidity is not a cure-all, and good airflow still matters, especially when the mix remains damp.
Recognising transplant shock
Transplant shock may appear as drooping, slower growth, or a small amount of leaf loss after the move. These signs do not automatically mean the repot has failed. We should check moisture, light, temperature, and pests before taking further action.
Patience is often more helpful than another intervention. If the stems remain firm and the roots were handled gently, the plant may simply need time to adjust. Remove only leaves that are fully dead, and avoid repeated moving while it settles.
Knowing when to resume fertilising
Fresh potting mix may contain enough available nutrition for a period, and newly disturbed roots can be sensitive to strong fertiliser. We can wait until the plant shows signs of resumed growth before returning to its usual feeding routine. The timing depends on the mix, the plant, and the season.
When feeding resumes, follow the product directions rather than adding extra in an attempt to speed recovery. A healthy root system and stable conditions matter more than a heavy dose of fertiliser.
Avoid common beginner repotting mistakes
Most repotting problems come from doing too much rather than too little. A larger container, more water, or aggressive root trimming can seem helpful but may create new stress. By keeping the plant’s existing conditions in mind, we can make a measured change and observe the result.
Moving a plant into an oversized pot
An oversized pot contains more mix than the roots can use, so it may remain damp for a long time after watering. This can reduce air around the roots and make it harder to judge when the plant needs water. Choosing a container only slightly larger is usually a safer starting point.
If a plant needs more stability, we can use a heavier outer cover or a support rather than giving the roots a much larger volume of wet mix. The container should solve the actual problem, not create a new one.
Using garden soil for indoor plants
Garden soil is often too dense for containers and may hold water unevenly. It can also introduce unwanted organisms or compact around indoor roots. A purpose-made indoor potting mix is better suited to the limited space and drainage conditions of a houseplant container.
We should resist the idea that ordinary soil is automatically more natural or nourishing. In a pot, the physical structure of the mix is just as important as its ingredients because roots cannot escape a poorly draining container.
Damaging healthy roots unnecessarily
Healthy roots help a plant recover, so they should not be cut merely because they are visible or slightly tangled. Loosen the outer layer gently and remove only roots that are dead, damaged, or clearly unhealthy. Keeping the central root ball intact often makes the transition less disruptive.
If the roots are extremely compacted, we can work gradually rather than tearing through them. Gentle handling protects recovery and gives us a better chance of preserving the plant’s existing relationship with its mix.
Repotting too frequently or at the wrong time
Frequent repotting can disturb a plant that is already growing well. We should respond to evidence such as crowded roots, degraded mix, or drainage problems instead of using a routine date for every plant. A newly purchased plant may also benefit from a short period of observation before we decide whether it truly needs a new container.
Once the plant is repotted, we can record the date and monitor how quickly the mix dries. That simple habit helps us make the next decision from the plant’s behaviour rather than from impatience or appearance alone.